

Email senders overview
A sender is the mailbox your email actually leaves from. Every Shopify Flow email action pairs one sender with one email layout.
Open Email Senders in the app navigation. There are two ways to set one up.
| Connected accounts | SMTP servers | |
|---|---|---|
| Providers | Microsoft 365, Google | Any SMTP server |
| Setup | Sign in once and approve access | Host, port, username, password |
| Credentials stored | None - OAuth tokens, refreshed automatically | Yes, encrypted |
| Best for | Microsoft 365 and Google Workspace mailboxes | SendGrid, Mailgun, Amazon SES, Postmark, your own relay |
[!TIP] If your business email is on Microsoft 365 or Google Workspace, use a connected account. App passwords and stored SMTP credentials expire, get rotated, and sit in a database - OAuth avoids all three problems, and you never have to touch it again.
Connected accounts
Click Manage connections to reach the Connected accounts page, where you add and manage OAuth providers.
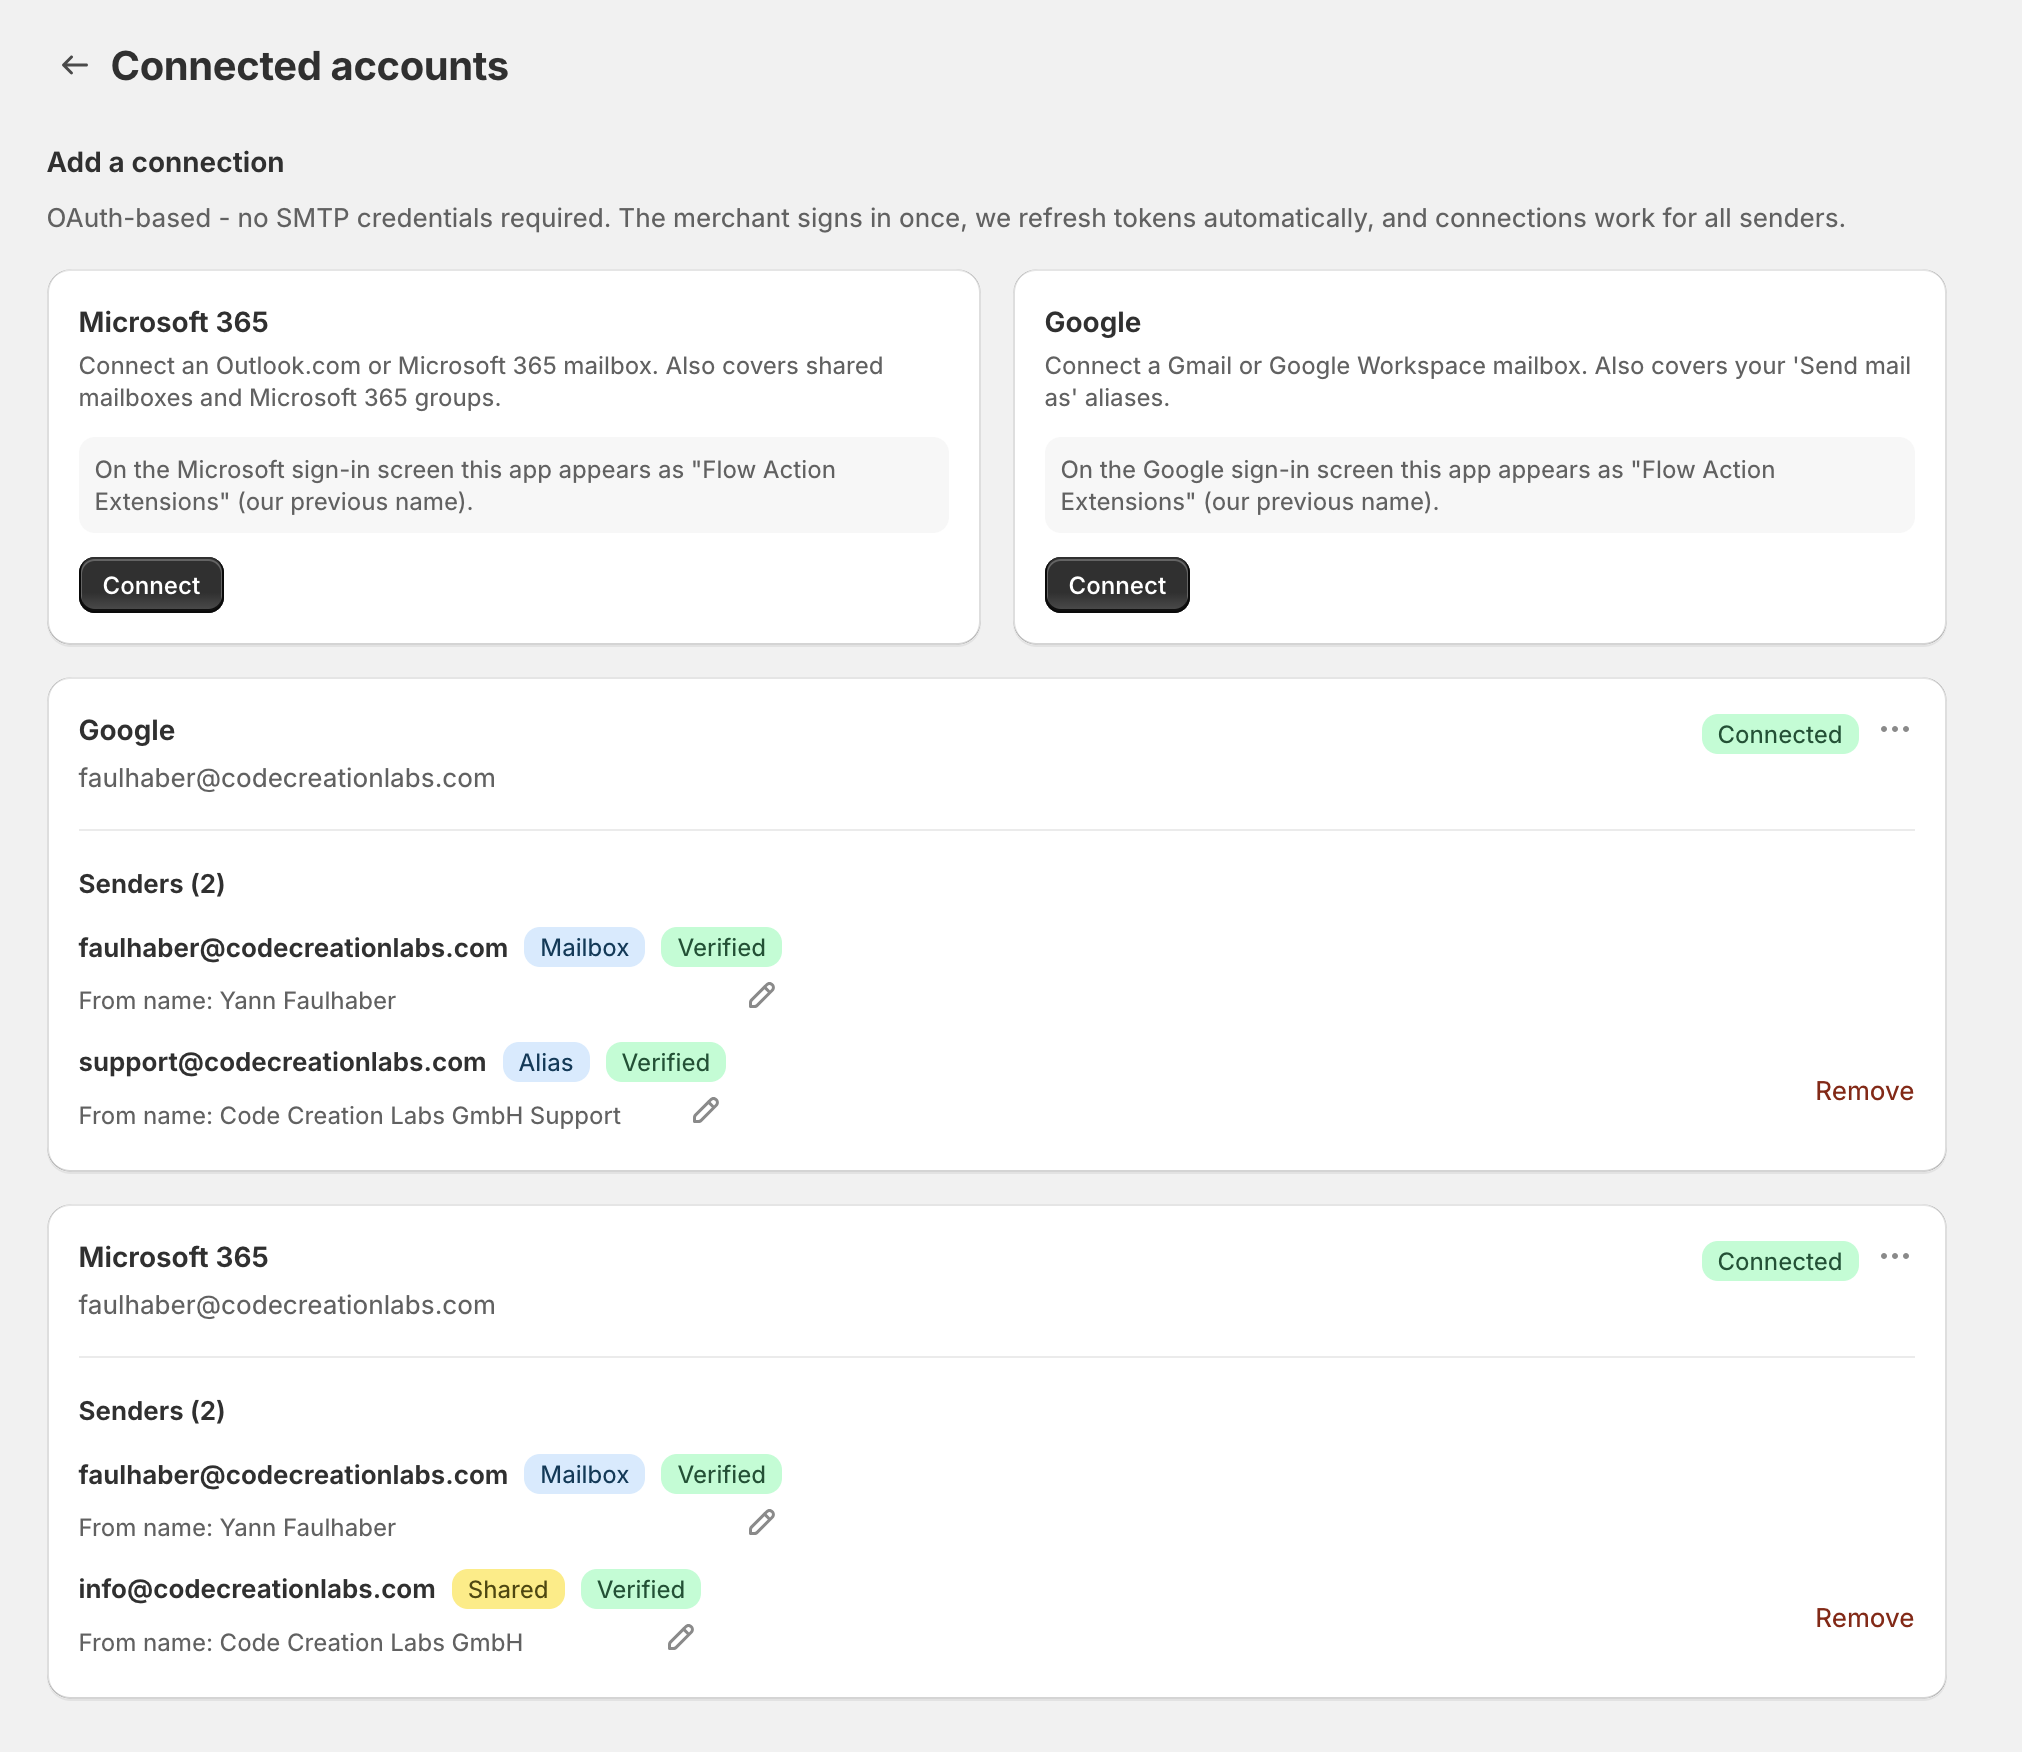
One connected account can expose several senders. Each carries a badge telling you what it is:
| Badge | What it is |
|---|---|
| Mailbox | The account you signed in with |
| Shared | A Microsoft 365 shared mailbox, such as info@ |
| Group | A Microsoft 365 group mailbox |
| Alias | A Google "Send mail as" alias |
Every sender also shows Verified, Not verified or Verification failed. Verification confirms the provider will actually let you send from that address - Microsoft requires Send As or Send on behalf permission on a shared mailbox, and Google requires the alias to be set up under Gmail's "Send mail as" settings.
The connection itself shows Connected or Reconnect required. If you see the latter, use Reconnect on the account card to re-grant access - do not disconnect and start over, as that would break Flow steps pointing at its senders.
From names
Each sender has an optional from name, shown next to the address in the recipient's inbox. Set it to your store or company name via the pencil icon - Acme Store reads better than a bare orders@acme.com.
Adding shared mailboxes, groups and aliases
- Microsoft shared mailbox or group: use Add shared mailbox in the account's menu. The app verifies it by sending a one-line message from that mailbox to your sign-in mailbox.
- Google alias: set it up in Gmail's "Send mail as" settings first, then use Refresh senders in the account's menu to pull it in.
Full walkthroughs: Send email from Shopify Flow with Microsoft 365 and Send email from Shopify Flow with Google.
SMTP servers
Click Manage SMTP servers to add a server with a host, port, username and password. Encryption is derived from the port automatically - 465 means SSL, 587 means STARTTLS.
A successful Test Connection is required before you can save a new server. That is deliberate: a wrong port or a bad password should surface now, not as a silently dropped customer email later.
Username and password can be left blank for a relay that authenticates by IP instead. If your relay restricts senders by IP, the app shows its outbound sending address on the SMTP page so you can allowlist it.
Full walkthrough: Send email from Shopify Flow with a custom SMTP server.
Send a test email
The Send test email button on the Email Senders page sends a short message through any sender you pick, to any address you choose. Use it after every setup change - it isolates a mailbox problem from a workflow problem in about ten seconds, and it does not count against your plan.
Removing a sender
Senders and accounts still referenced by a Shopify Flow step cannot be removed. The app blocks it and tells you how many steps depend on it, so a live workflow is never left pointing at a sender that no longer exists.