

Send email from Shopify Flow with Google
Overview
You can use Workflow Transactional Email to send through a connected Google account instead of an SMTP server. You authorize the mailbox once and the app sends on your behalf - there are no app passwords or SMTP credentials to manage.
In this guide you will:
- connect Google from Email Senders
- send a test email to confirm the connection works
- build a Shopify Flow that uses the Send Transactional Email action
- send an email when a customer gets the
viptag
Before you start
- Install Workflow Transactional Email in your Shopify store.
- Create the email layout you want to send before building the workflow. See Build an email layout.
- Have access to the Google account you want to send from.
Video guide
The video has no sound, so adjust the playback speed to suit you.
Connect your Google account
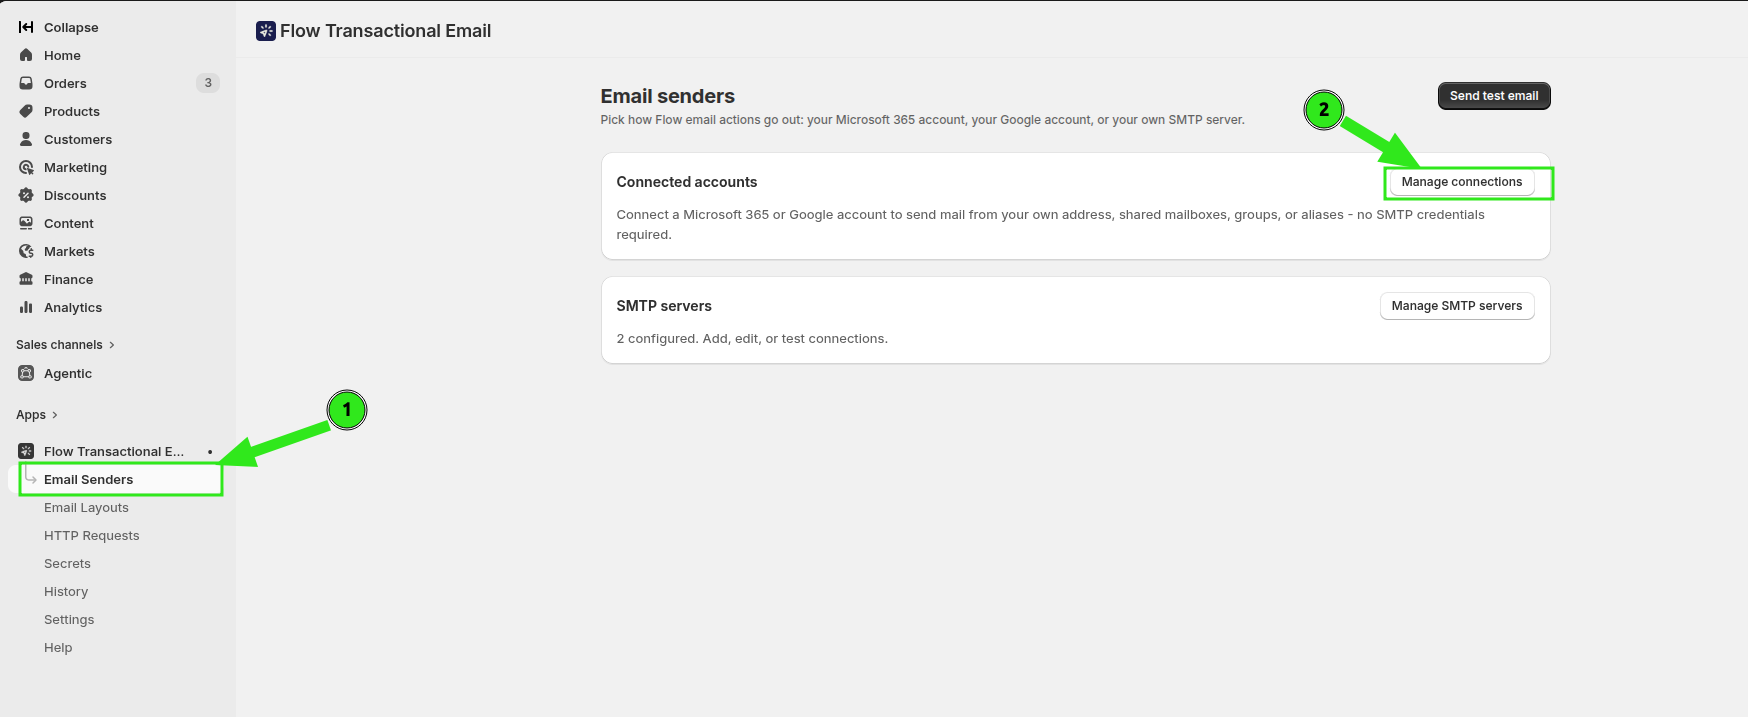
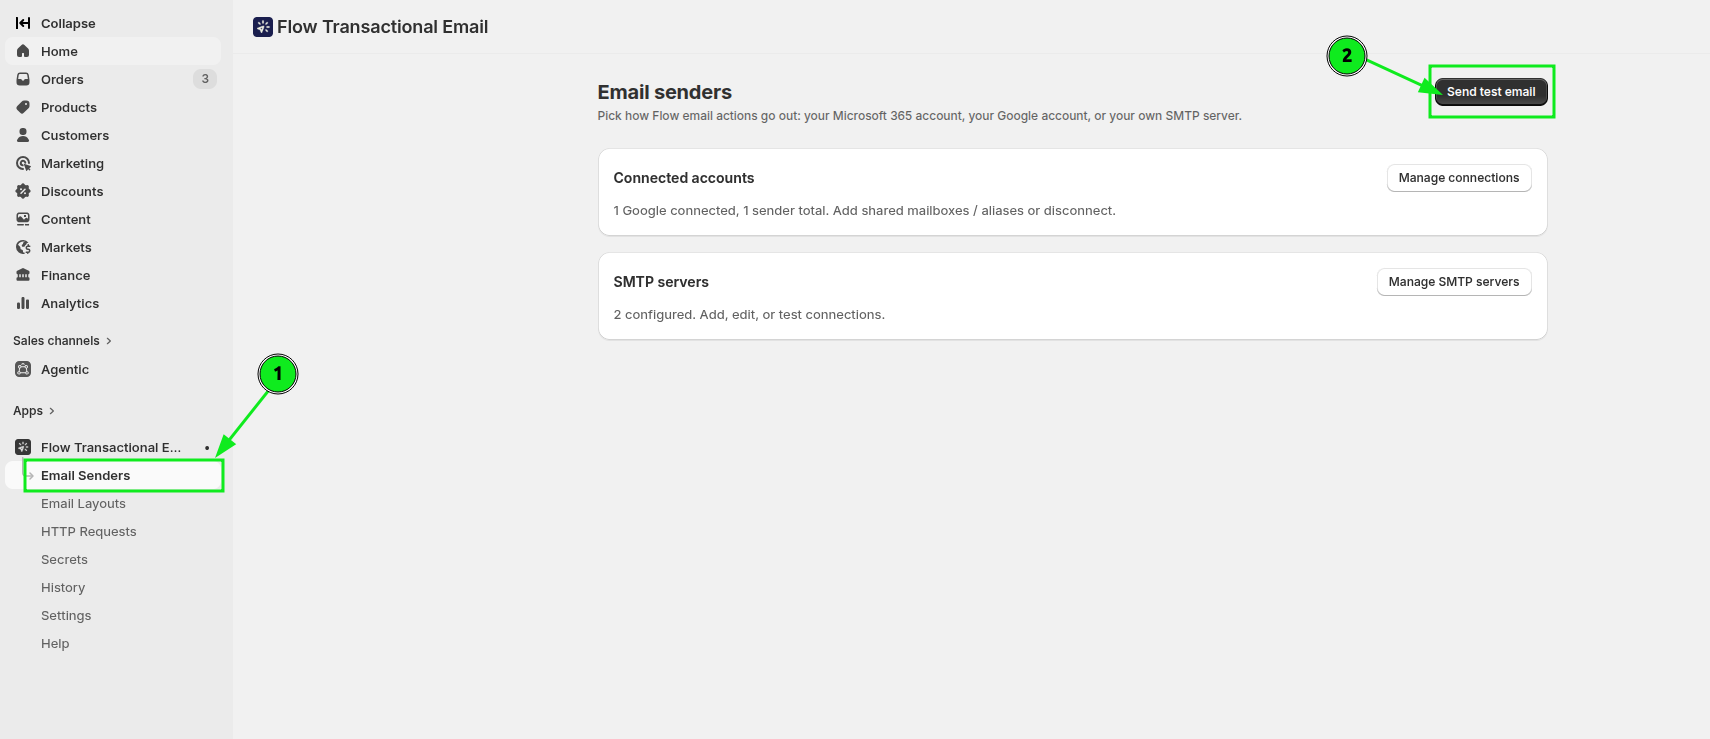
In the Shopify admin, open Apps and select Workflow Transactional Email. In the app navigation click Email Senders, then click Manage connections in the Connected accounts section.
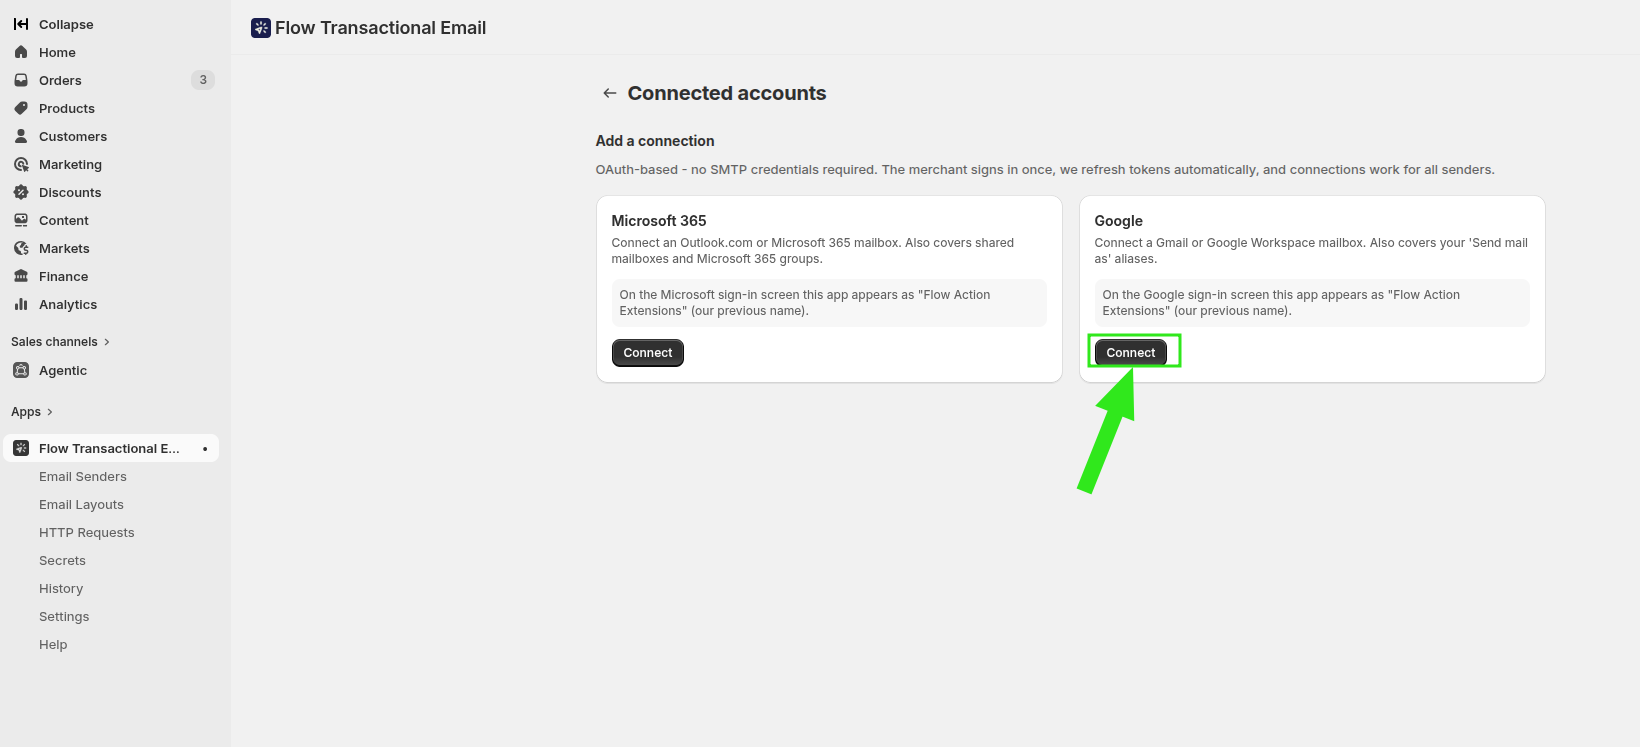
On the Connected accounts page, find the Google card under Add a connection and click Connect.
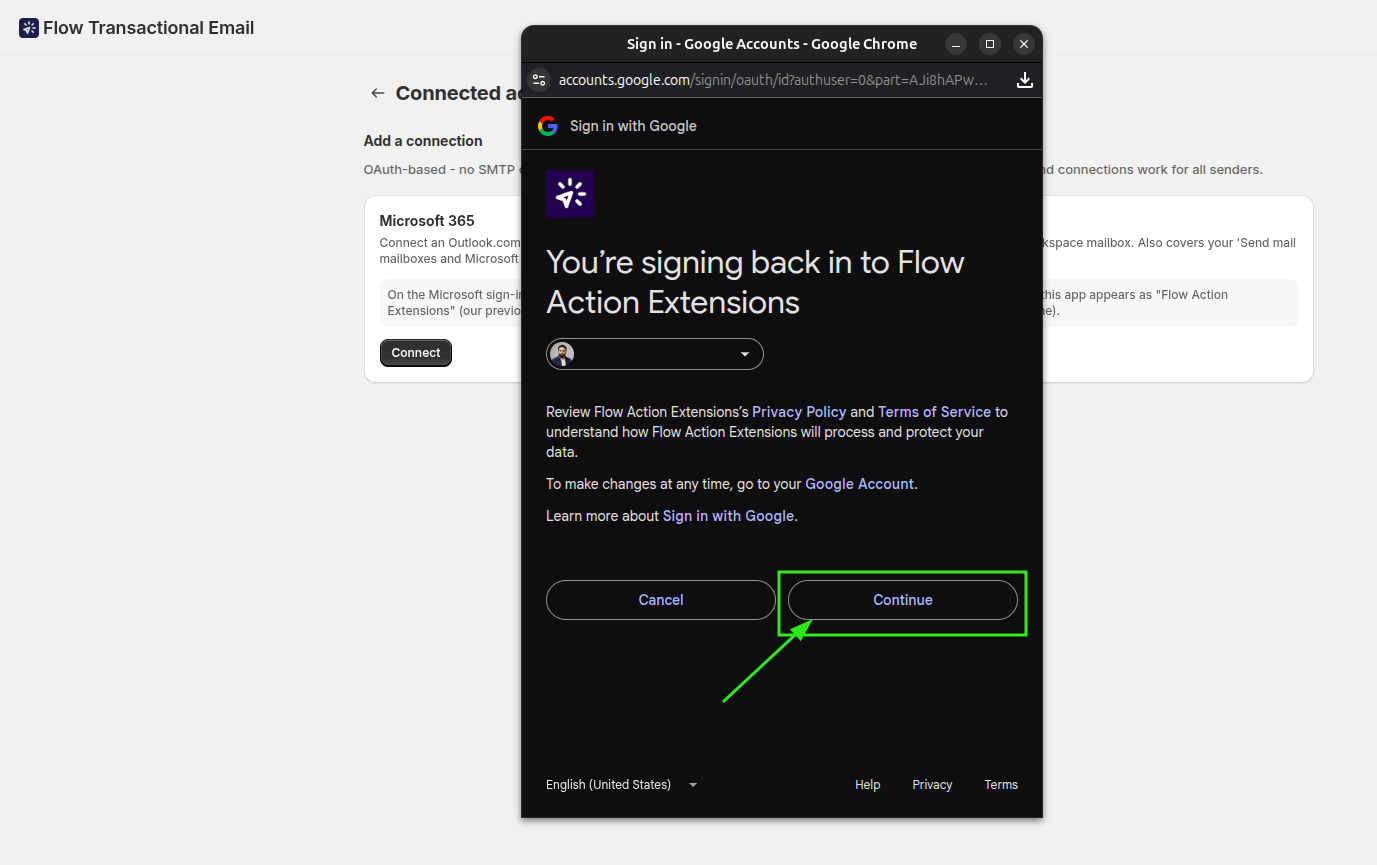
A Google sign-in window opens. Sign in to the account you want to use, review the permissions, then approve access.
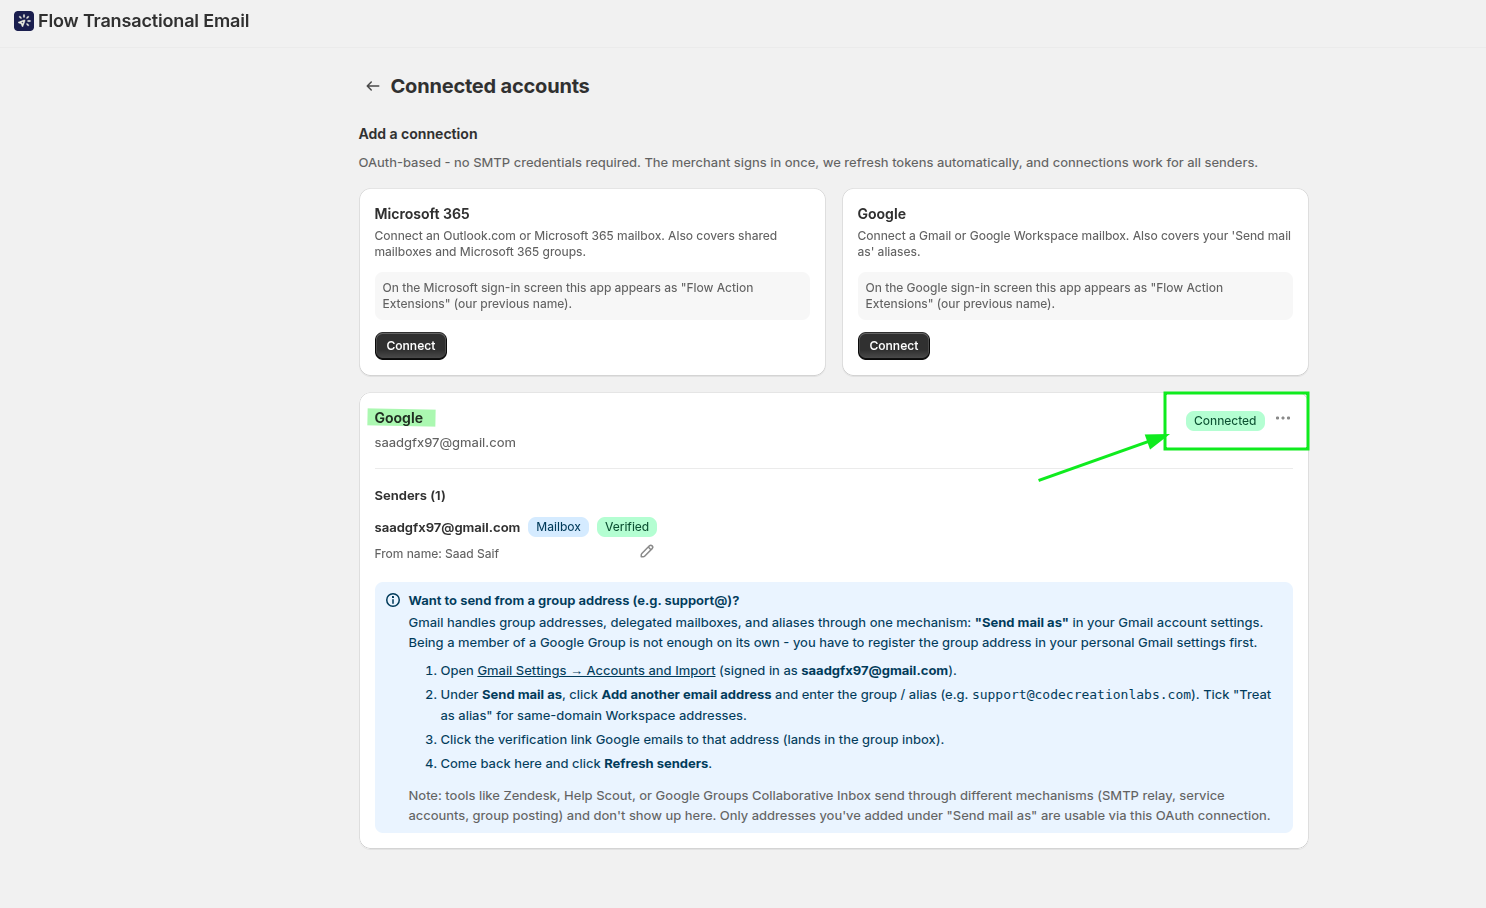
Back in the app, the Google connection appears under Connected accounts with a Connected badge, and the available senders are listed beneath it.
Send a test email
Before adding the sender to a workflow, send a test message to confirm delivery. Go back to Email Senders and click Send test email.
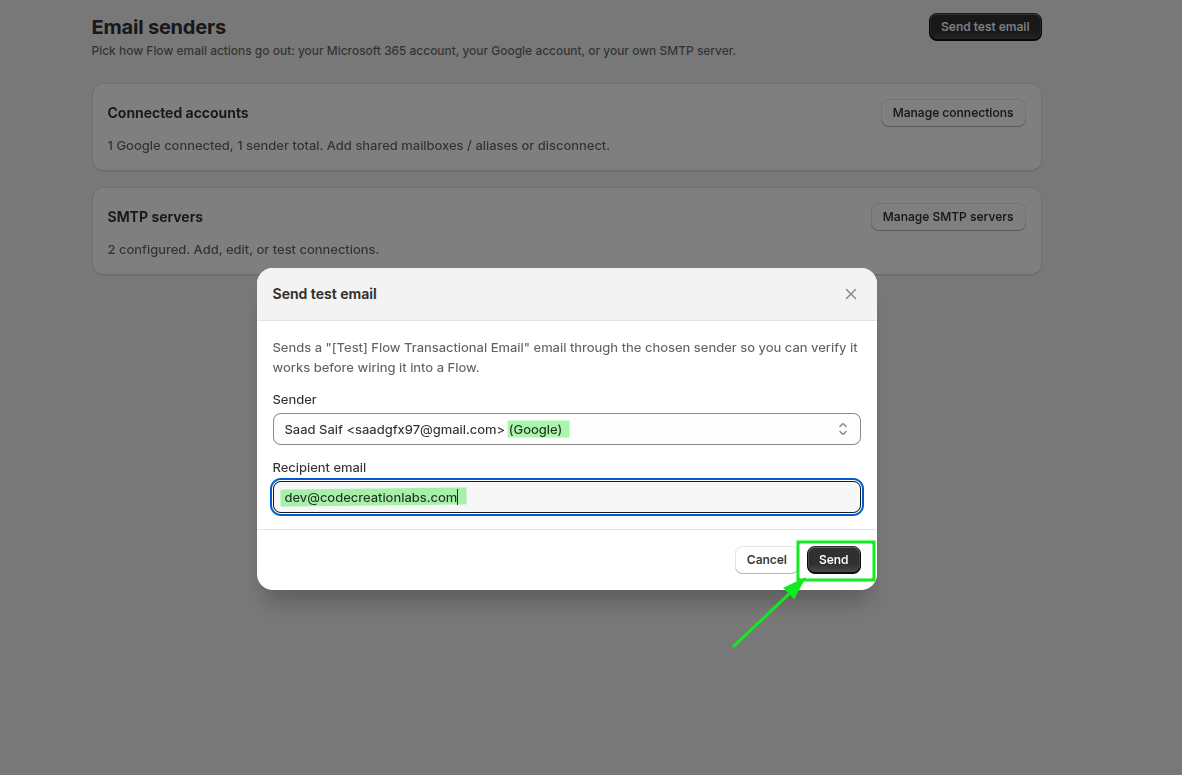
In the Send test email dialog, select your connected Google sender in the Sender dropdown, enter the destination in Recipient email, then click Send.
Check the recipient's inbox - the message should arrive from the connected Google account. If the test lands, you can use the same sender in Shopify Flow with confidence.
Create the Shopify Flow workflow
Now set up a workflow that sends email when a customer receives the vip tag.
Open Shopify Flow and create a new workflow. Select the trigger Customer Tags Added, which starts when one or more tags are added to a customer.
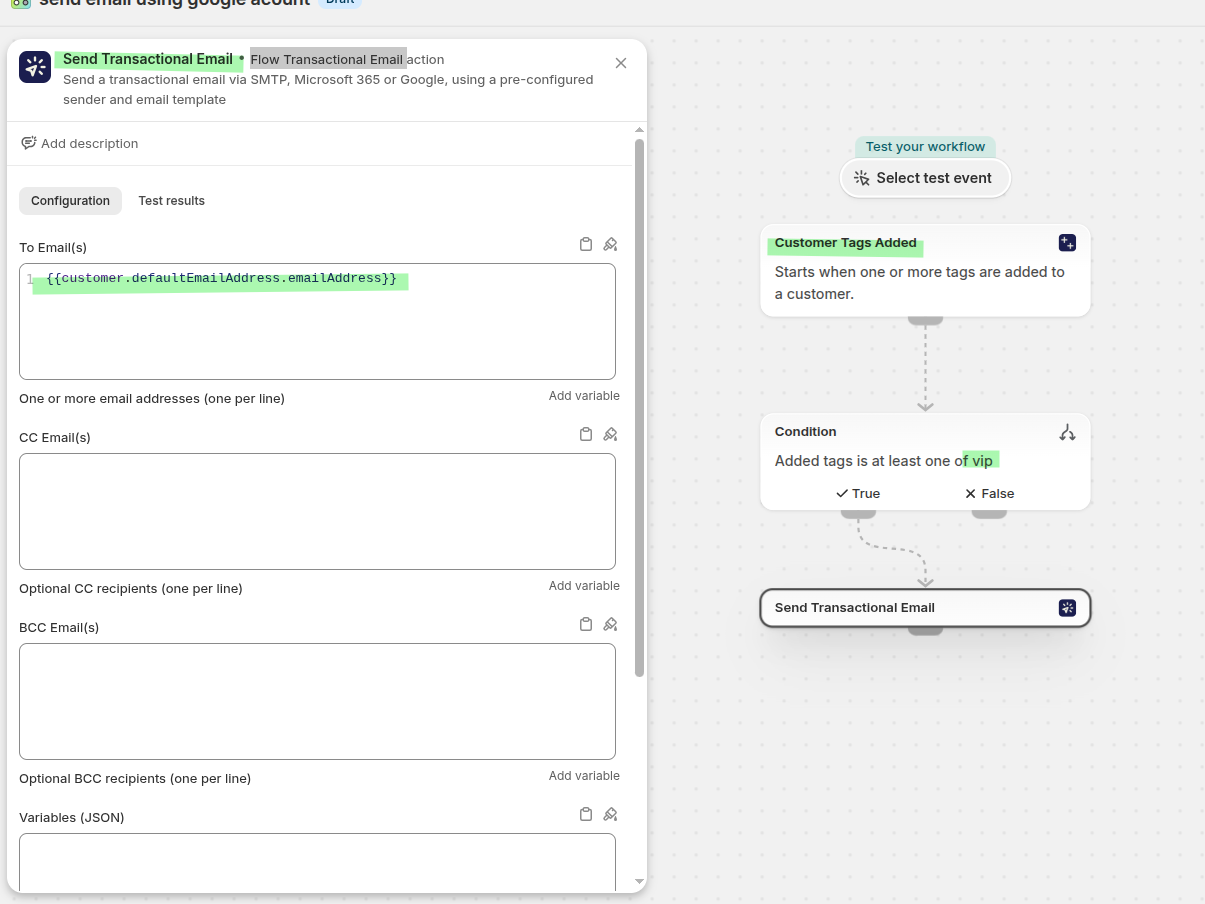
Add a condition so the workflow continues only when the added tags include vip - for example Added tags is at least one of vip.
On the True branch, add the action Send Transactional Email. In To Email(s), use the customer email variable so the message goes to the tagged customer:
{{customer.defaultEmailAddress.emailAddress}}Open the action configuration and choose your connected Google account in Send from, then choose the layout you want in Template. Click Save, then Exit to return to the workflow.
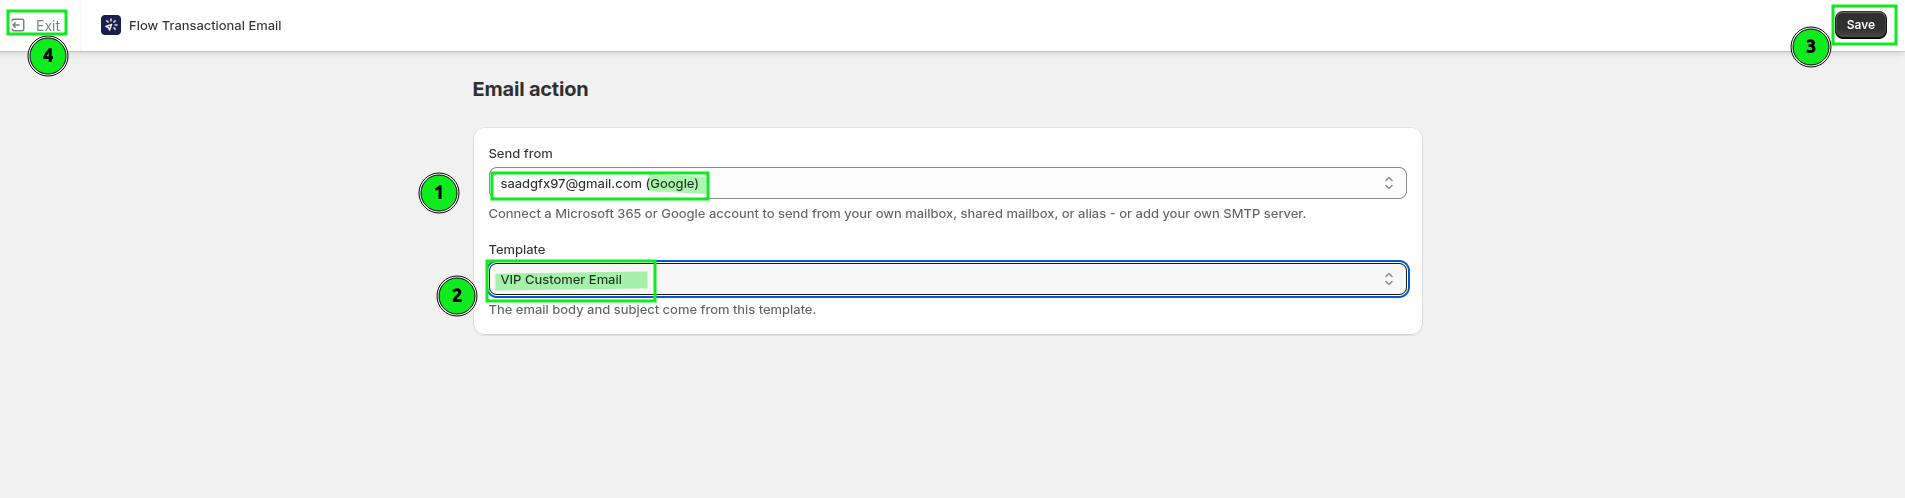
Save the workflow, then turn it on.
Test the automation
- Add the
viptag to a customer in Shopify. - Wait for the workflow to run.
- Check the customer's inbox.
If everything is wired correctly, the customer receives the email through your connected Google account.
What to check if the email is not sent
- Go back to Email Senders and confirm the account still shows as Connected.
- Make sure To Email(s) uses the customer email variable from Shopify Flow, not a hard-coded address - unless you are deliberately testing.
- Confirm the workflow is turned on and that the customer really received the
viptag. Tag matching in the condition is exact. - Use Send test email from Email Senders to isolate whether the problem is the mailbox or the workflow.
- Open History in the app for the exact error on a specific send. See History and troubleshooting.
Related
- Send email from Shopify Flow with Microsoft 365 - the same setup with a Microsoft 365 mailbox.
- Send email from Shopify Flow with a custom SMTP server - use your own mail server instead.
- Variables and Liquid - pass Flow data into the subject and body.